


You just received your camouflage net and wonder how to install it on your pergola? Good news: installation is accessible to everyone, even without DIY experience. Just follow the right steps, in the right order, with the right tools. This guide takes you from A to Z, from choosing the net to seasonal maintenance.
Step 1: Choose the right net for your pergola
Before talking about fixing, you first need the net adapted to your structure. Three criteria matter: the shape, the size and the color.
Rectangular or triangular shape?
If your pergola is classic (4 sides, flat roof), a rectangular camouflage net is the logical choice. It covers the entire surface in one piece. For a pergola attached to a wall or to create a shade sail effect with a slope, a triangular net will be more suitable — and visually more original.
What size to order?
Measure the surface of your pergola (length × width) and add 20 to 30 cm margin on each side. This extra allows the net to be stretched properly and creates enough fixing points on the edges. Our nets are available in all sizes, from 3×3 m to 10×10 m. If your pergola exceeds the size of a single net, it is perfectly possible to connect two nets together with cable ties (more on that below).
Tip: Unsure about the color or look? First order a sample for €4.90 to judge the quality and shade in real conditions before placing your final order.
Which color suits your exterior?
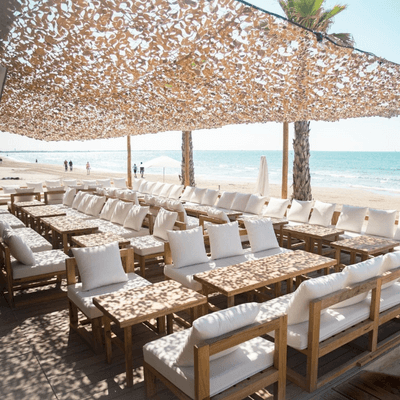
- Sand — the best seller, blends into all exteriors, ideal with wood or light stone
- White — Mediterranean vibe, bright, perfect for restaurant terraces
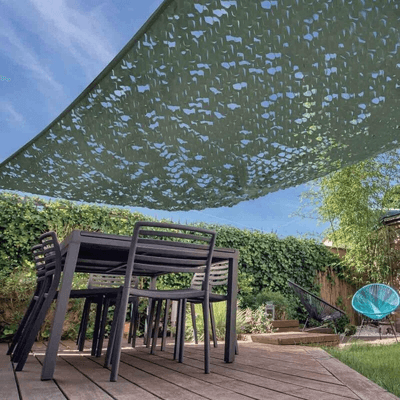
- Green — blends into a wooded garden, guaranteed natural look
- Gray — sober and modern, ideal on a metal structure
- Military — the classic multicolor camouflage, a bold adventurer look
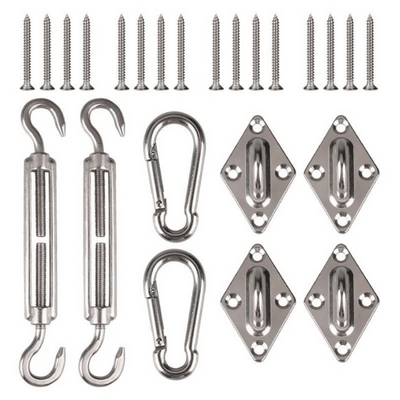
Step 2: Prepare the fixing equipment
Your net alone is not enough: you need the equipment to securely fix it to the structure. Here is what you will need:
| Equipment | Usage | Recommended quantity |
|---|---|---|
| Zip ties (cable ties) | Fix the net to the structure — essential | 1 zip tie every 10 to 15 cm on the sides fixed to the pergola |
| Ratchet ropes | Stretch the net between two points (wall ↔ pole) | 2 to 4 depending on your setup |
| Polyester fixing rope | Attach the ends, reinforce the tension | 10 to 15 m depending on the size of the pergola |
| Scissors or cutter | Cut excess zip ties and adjust the net | 1 |
| Step stool or ladder | Reach the top of the pergola | 1 (+ 1 person to help, it’s much easier with two) |
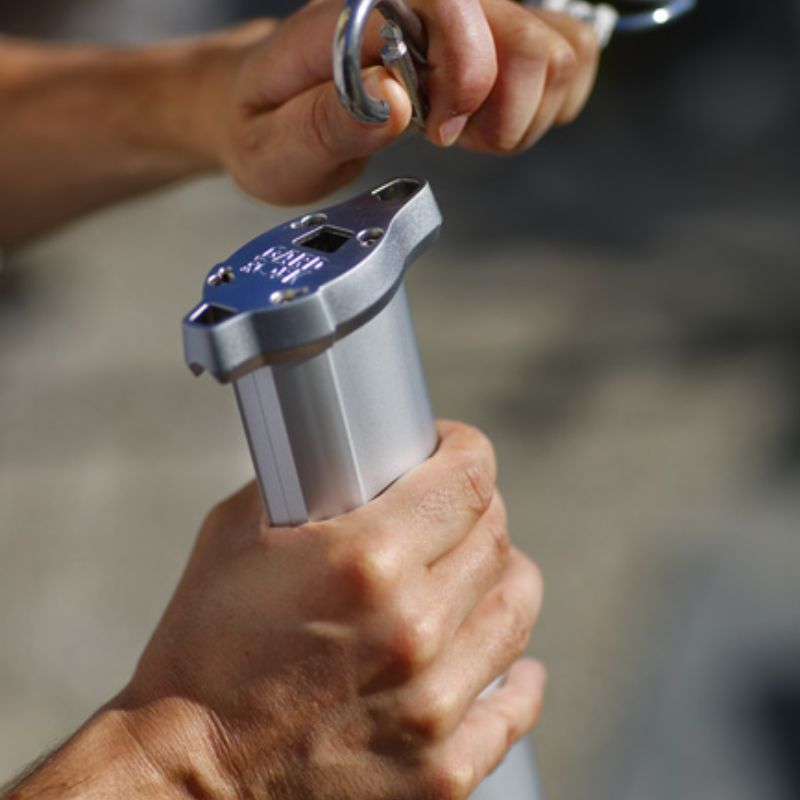
No pergola? If you want to install your net above a terrace without an existing pergola, our aluminum telescopic poles with anchoring bases allow you to create your own fixing points. A steel cable stretched between the wall and the poles will serve as support for the net.
Step 3: Install the net — in the correct orientation
This is the point many people overlook: a reinforced camouflage net has a correct orientation. Identify the side with the reinforcement cord (the braided ropes running along the edges forming the support grid): this side must be facing the sky. The fabric strips (the "foliage") then naturally hang downwards, creating the shading effect and the characteristic play of light.
In practice:
- Unroll the net on the ground next to the pergola to identify the correct orientation and check the dimensions.
- Get help from a second person. Together, mount the net on the structure and position it so that it slightly overhangs on each side (the excess will be fixed later).
- First fix the 4 corners with a zip tie each. This is the starting point: the corners provide the general alignment and allow the rest of the net to be properly tensioned.
Important: Never pull on the net fabric to stretch it — it is not stretchable. If the dimensions do not match your pergola, it means the chosen size is not right. It is better to have a net slightly too large (which can be folded) than too small (which will not cover and will tear under tension).
Step 4: Fix the edges — two methods to choose from
Once the 4 corners are in place, you need to fix all the edges of the net to the structure. Two methods exist, each with its advantages. You can also combine them depending on your setup.
Method 1: Zip ties — quick and effective

This is the most common and simplest method. Go along each edge of the net adding a zip tie every 10 to 15 cm. Pass each tie through the reinforcement loop (the reinforced meshes on the perimeter of the net), then around the tube or beam of your pergola. Tighten firmly and cut off the excess zip tie with scissors.
The advantages of zip ties: installation is quick, each fixing point is independent (if one tie breaks, the others still hold), and the cost is very low. This is the method recommended for most installations on wooden or aluminum pergolas.
Method 2: The laced rope — sturdy and aesthetic

The other method is to attach the net with a polyester fixing rope by making a continuous lacing along the entire edge. The principle is the same as a shoelace: you pass the rope through a mesh of the net, then wrap it around the beam or tube of the pergola, then go back through the next mesh of the net, and so on along the entire edge.
Practically, start from an already fixed corner. Pass the rope through the first mesh or reinforcement loop of the net, pull it towards the pergola structure, wrap it around the tube or beam (a full turn is preferable), then return to the net and pass through the next mesh, about 10 to 15 cm from the previous one. Repeat this along the entire edge while maintaining consistent tension at each pass. At the end of the edge, tie the rope securely with a double knot or a clove hitch.
This lacing technique creates a continuous fastening that distributes tension very evenly along the entire length — unlike zip ties which create point fixings. This is a real advantage on large pergolas exposed to wind, as there is no "free" zone between two attachments where the net can flap. The finish is also cleaner visually: no small plastic bits sticking out, just a discreet rope following the structure.
The main drawback of this method: it takes a little more time than zip ties (allow 15 to 20 minutes more for a standard pergola), and dismantling at the end of the season is slightly longer since you have to undo the lacing. But in terms of strength and durability, it is the most reliable method.
Which method to choose?
In summary: zip ties are perfect for a quick installation, easy to dismantle and redo each season. The lacing rope is ideal if you want an ultra-strong fastening, a more aesthetic finish, or if your pergola is very exposed to wind. Nothing stops you from combining both : zip ties on the sheltered sides, rope on the side facing the prevailing wind.
Why so many fastenings in both cases?
A camouflage net acts like a sail in the wind. Even though the fabric is open-weave and lets some air through, wind loads remain significant — especially on large surfaces. Attachments spaced 10 to 15 cm apart (whether zip ties or lacing) distribute the load across the entire structure and eliminate "pockets" where the wind can rush in. This prevents tearing.
Do you need to connect two nets together? If your pergola is larger than a single net, overlap the edges by 15 to 20 cm and connect them with zip ties or rope every 10 cm. The result will be visually uniform — the joint disappears once the net is stretched.
Step 5: Stretch and Adjust
After fixing the edges, step back and inspect the result:
- Sagging areas? Add extra attachment points in the center of the net if your pergola is wide. You can run a fixing rope along an intermediate crossbar and attach the net to it.
- Net too loose on one side? Ratchet straps allow you to easily adjust the tension — it works like a luggage strap but sturdier.
- Excess fabric? Fold it neatly under the edge and secure it with extra zip ties. Do not cut the net unless the excess is really significant — it can be useful for replacements.
Shake the net lightly to check that no attachment point is loose. If everything holds, well done: the installation is complete.
Maintenance: what you need to know to make it last
Should the net be taken down in winter?
Yes, it is recommended. Our camouflage nets are designed for sun protection and outdoor decoration — they withstand rain and UV very well, but prolonged exposure to snow, frost, or strong winter winds can accelerate wear on the fastenings and fabric. Take down your net at the end of autumn, fold it, and store it in a dry place. You will reinstall it in spring in a few minutes since the attachment points will already be in place.
How to clean your net?
A simple spray of water is enough to remove dust, pollen, and fallen leaves. Do this once or twice per season. No detergent or pressure washer needed — the polyester fabric of our reinforced nets cleans easily.
Regular check
After each episode of strong wind, take 5 minutes to check that all fastenings are in place. Replace damaged cable ties immediately — a single missing attachment point and the entire edge of the net catches the wind.
Our recommended products for this installation
| Product | What it's for | Link |
|---|---|---|
| Reinforced camouflage net (8 colors) | The net itself — choose your color and dimensions | See the collection → |
| Complete fixing kit | Everything you need in one pack: ties + hooks | See the kit → |
| Cable ties | To multiply attachment points (1 every 10-15 cm) | Order → |
| Ratchet ropes | To stretch the net between wall and post | Order → |
| Aluminum telescopic pole | Create a fixing point without a pergola | Order → |
| Sample | Test the color and quality before buying — €4.90 | Order → |
Frequently Asked Questions
How many cable ties are needed for a 3×4 m pergola?
For a 3×4 m pergola (perimeter = 14 m), allow about 90 to 140 cable ties spaced 10 to 15 cm apart. Always plan a few extra for adjustments and future replacements.
Can a camouflage net be installed alone?
It is possible on a small pergola (3×3 m or less). Beyond that, it is strongly recommended to have two people : one holds the net in position while the other fixes the corners and edges. It is faster, more precise, and safer if you use a ladder.
Does a camouflage net resist rain?
Yes. Our reinforced polyester nets withstand rain perfectly — the openwork fabric naturally lets water flow through without creating water pockets. However, they are not waterproof tarps: they protect from the sun and create shade but do not replace a waterproof roof.
What is the difference between a reinforced net and a simple net?
A reinforced net has a network of braided cords (the reinforcement cordage) forming a strong grid on which the fabric is fixed. This cordage distributes the tension forces and makes the net much more wind-resistant. A simple net (without reinforcement) tears more easily and is only suitable for temporary or indoor decorative use. For an outdoor pergola, a reinforced net is essential.
Can a camouflage net be used for a restaurant or bar?
Absolutely. More and more restaurant professionals use camouflage nets to shade their terraces. For ERP (Public Access Buildings), we offer a M3 fire-retardant camouflage net. Feel free to request a custom quote for large areas.
How long does the installation take?
Allow about 30 minutes to 1 hour for a standard pergola (3×3 to 4×4 m) with two people, including equipment preparation. Larger pergolas or complex setups (multiple nets to connect, poles to install) can take 1h30 to 2h.
Leave a comment
All comments are moderated before being published.
This site is protected by hCaptcha and the hCaptcha Privacy Policy and Terms of Service apply.